Showing posts with label opi. Show all posts

Thursday, January 9, 2014

Polish Me Silly "Freckles" Swatch

Heeeeeeeey, look at me go! After not updating at all for two months, I'm starting to get back into it. Mostly because I have a million pictures piled up on my hard drive that I need to sort through and edit, so by default I'm having to blog as well. But at least I enjoy it. :)

So today I have an awesome swatch for you - Polish Me Silly (formerly known as Lush Lacquer) Freckles! My friend Payton got me this indie polish for my birthday (waaaay back in October - see how behind I am?) and I practically wore it the second she gave it to me. So even though these pictures were taken a while ago when it was fall, the colors are better for winter and spring. Just like with my other swatch/review thingies, I'll show you the swatch first and then talk about the formula afterwards.
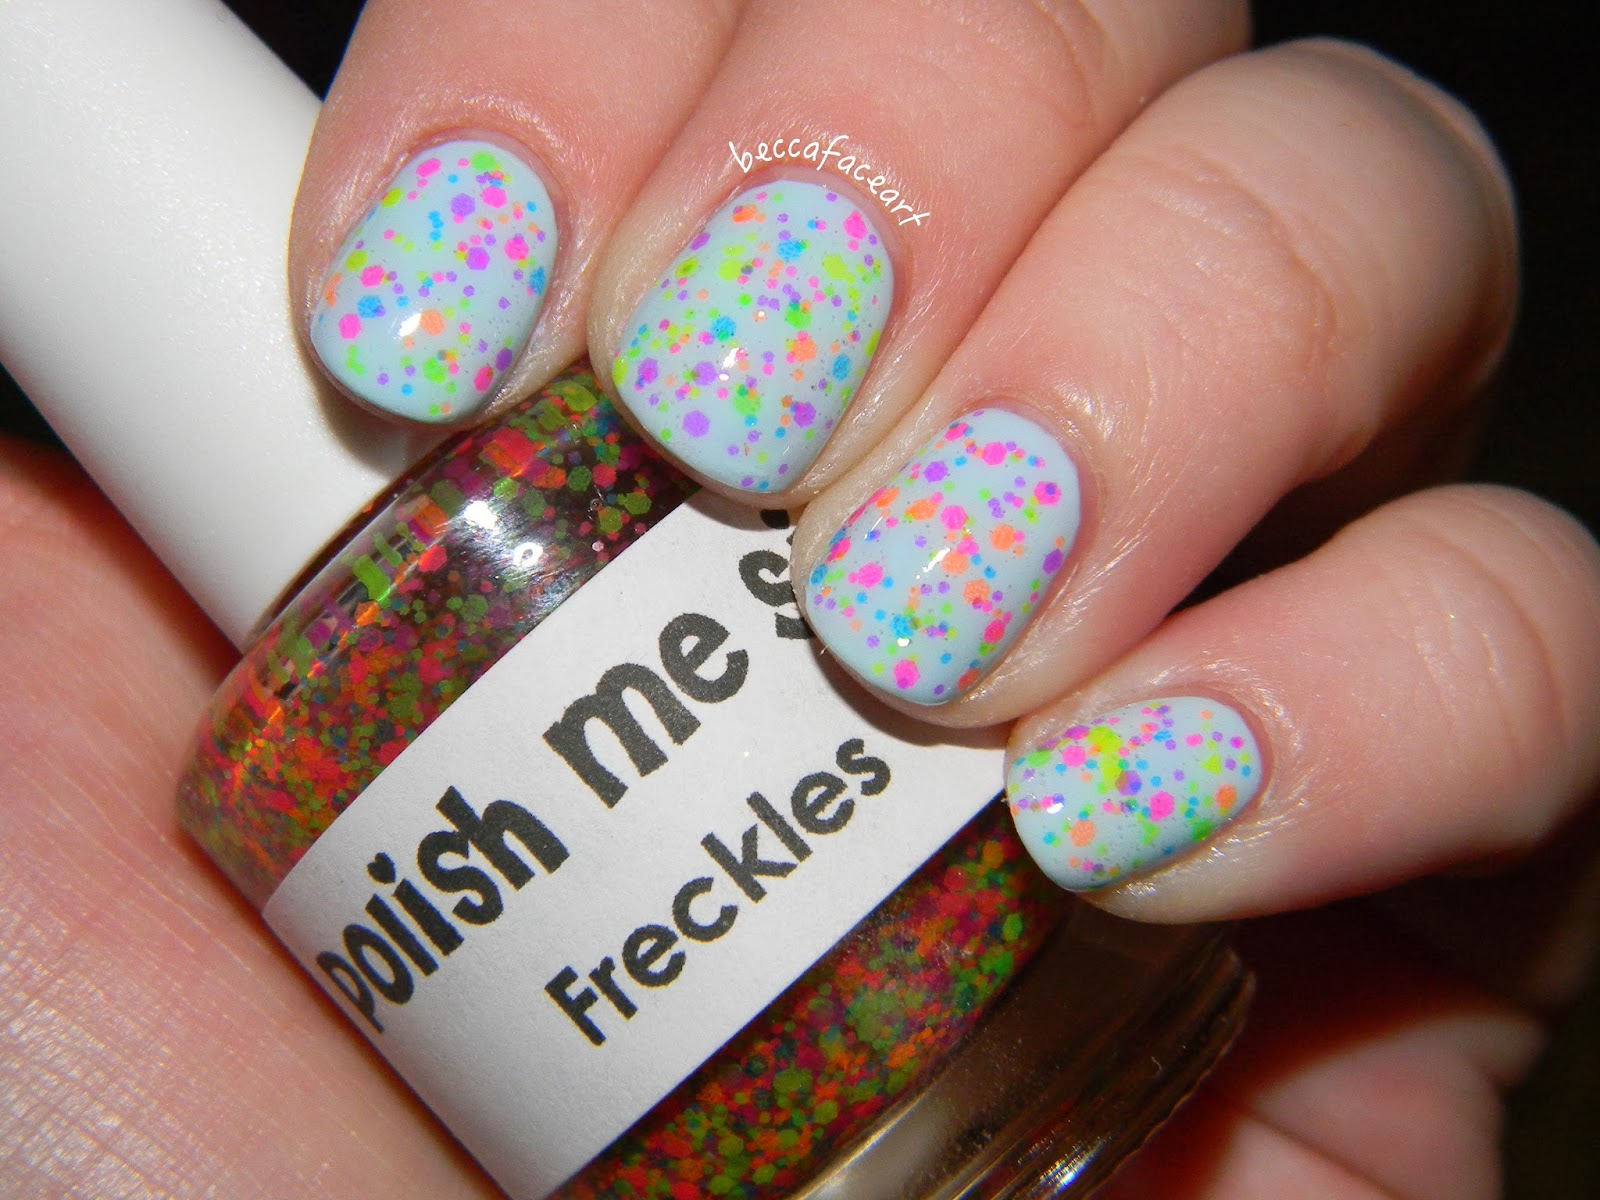

This is one coat of Freckles over three coats of OPI Gargantuan Green Grape - And yes, that's GGG. It's just the blue version, not the green version. I might do a comparison of that someday, because there are definitely two versions of GGG. 

Alrighty, on to the formula and my thoughts about Freckles. First of all, Freckles has tons of small neon blue, green, pink, purple, orange, and highlighter yellow glitters packed into it. And the formula is awesome! It's not too thick, and it has great glitter payoff. I think this polish is really unique as far as the glitter goes - I know plenty of indie brands have some form of neon glitters, but this is my first time experiencing one, and it was interesting to find that the glitters are actually transparent and ultra-thin, just like neon nail polish. They're made of a different material than regular glitters. I liked them a lot! The only problem with these glitters is that you really can't put them over a dark color, because then they'll be dull and a few different shades of swamp. So I tested Freckles over a few bright colors, and I found that it works best over white, very light blue, pastel green, light purple, and bubblegum pink (I specifically used Gargantuan Green Grape, OPI You're Such a Budapest, Fresh Paint Honey Dew, and OPI Chic From Ears to Tail). You only need one coat for a perfect spread of rainbow freckles on your nails! I give this a 10/10 would wear again and again and again.

Thanks for reading, have a great day, and happy painting! :)

Tuesday, December 31, 2013

I'm a liar! And two New Year's Eve designs for you...

Hello all! Yes, I am a liar. I said I would have a lot of holiday designs and I was going to be posting regularly again and whatnot, and it just didn't happen. Technically I did have several holiday designs, but I just never posted them. I'm still trying to decide if I want to post them or just wait until next year. It's been a hectic month. You know? Sometimes things just suck and it was one of those times for me, so I hope you're not too upset. I'm sorry that I'm failing, haha. But I hope that these two mani's make up for it! These would be great for a New Year's Eve party! :)


This is a super simple manicure - just black and silver textured polish! It's super chic and would be perfect for celebrating the new year. Here I've used two coats of OPI It's Frosty Outside on my thumb and ring finger, and three coats of OPI Emotions on my index, middle, and pinky fingers. 


And here's a slightly more complex design for those of you who like a little more out of your mani's - I'm wearing this design right now for my party/get-together tonight. (I apologize for the picture, I ended up taking the picture on my iPhone because I got fed up with the bad quality my camera was giving me.) On my thumb, middle, and pinky fingers I did two coats of Wet n' Wild Black Creme with a gold round stud on each. Then on my index, I painted two coats of OPI Louvre Me Louvre Me Not, which is one of my all time favorite OPIs. Such a great polish. And on my ring finger, I did two coats of Essie Good As Gold, with a coat of "So This Is Love" over it. "So This Is Love" is one of the custom polishes I made for my friends as their Christmas presents this year, so don't worry, there will be a full post about that polish coming up soon! Since you won't have that polish, a good substitute would be Orly Ridiculously Regal. And of course, you can always use gold polish and a dotter tool instead of studs.

Alrighty then! I hope you enjoyed the designs! And if I don't post again between now and 2014, I just want to say thank you so much for reading and sticking with me while I struggle through blogging, haha. I'm going to try a ton of new things in the new year, new things that I hope will allow me to post regularly and keep blogging fun instead of making it seem like a chore to me. I never wanted it to get that way, so hopefully the new things I'm going to try will spice it up and keep the nail art good for all of you as well. And I hope you all have an amazing New Year's Eve, and have an amazing time bringing in the new year. Thanks for reading, have a fantastic day, and happy painting! :)

Thursday, October 10, 2013

Pretty Pretty Princess Nails

Heeeey gurl, heeeey. So, I just got some new OPI polishes that I desperately wanted to wear. But it's October, and I also desperately wanted to wear some Halloween designs. The problem? All of the polishes I got were bright pink (and one super light purple). I didn't think this through. So, I came up with a solution - ¿¿Porqué no las dos?? Why not both? So I made up a little costume for my nails - a princess costume!!


Yes, I realize it's not very Halloween-appropriate. But who knows, someone out there might need it for an actual princess costume! On my thumb and ring finger, I did two coats of OPI Suzi's Hungary Again and then stamped the crown image from MASH plate 49 with Essie Good As Gold. The pink glitter pieces are from OPI Minnie Style. On my index, middle, and pinky fingers, I painted three coats of OPI Chic From Ears To Tail, and then stamped the little swirly image from Pueen plate 26 on the tips of my nails with Suzi's Hungary Again. And then I topcoated and watched the magic happen! These were really cute, and I would wear this design again in a heartbeat. My 20-something-year-olds group of friends and I thought they were precious, so I'm sure there are some kids (adults too) out there somewhere that would love these to go with their costume. Anyone out there being a princess for Halloween? Let me know!

Thanks so much for reading, have a great day, and happy painting! :)

Sunday, October 6, 2013

31 Day Nail Art Challenge! Day 17: Glitter

Waaaaaasssuuuuup? So for this challenge, I've got a really fun design for you! :) One that both satisfies the glitter challenge, and is perfect for Halloween!


That's right... Googly eyes!! My glitter was the inspiration: Salon Perfect Kaboom. I tried getting a good close-up of the glitter, but my camera just isn't made for that, unfortunately. But I think you can tell in a few of them that the polish is actually just blue and yellow glitter. But the two of them together and the density of the glitter makes it look green overall! It's pretty awesome! I started with a base color of OPI Can't Find My Czechbook, and then two coats of Kaboom. I thought it looked kind of creature-ish, so I pulled out some googly eyes and made cute little monster nails. My friend actually said they looked more like dinosaurs, but that works too! These probably would have been hilarious with little mouths, but I was going for something easy that really focused on the glitter. If you're wondering about wearing googly eyes on your nails, I literally just pushed mine down into the wet glitter, and then I put top coat over it to seal them in. I thought they would come off immediately, because they stuck up off my nail pretty far, but they were practically cemented on my nails, haha. I couldn't pull them off if I tried. At least, not without hurting myself. I don't suggest using Seche Vite as a top coat to seal 3D pieces on to your nails, because that never worked for me. I used Out The Door to seal mine in. But it's up to you. :) And to remove the glitters (I thought it was going to be awful because they were cemented to my nails) but I just used the glitter-foil-removal method, and they came off beautifully! Actually, I think the acetone melted the plastic eyes, haha. 

The eyes really gave my nails character, so let me know if you decide to try it out! Thanks for reading, have a great day, and happy painting! :)

Sunday, September 15, 2013

31 Day Nail Art Challenge! Day 13: Animal Print

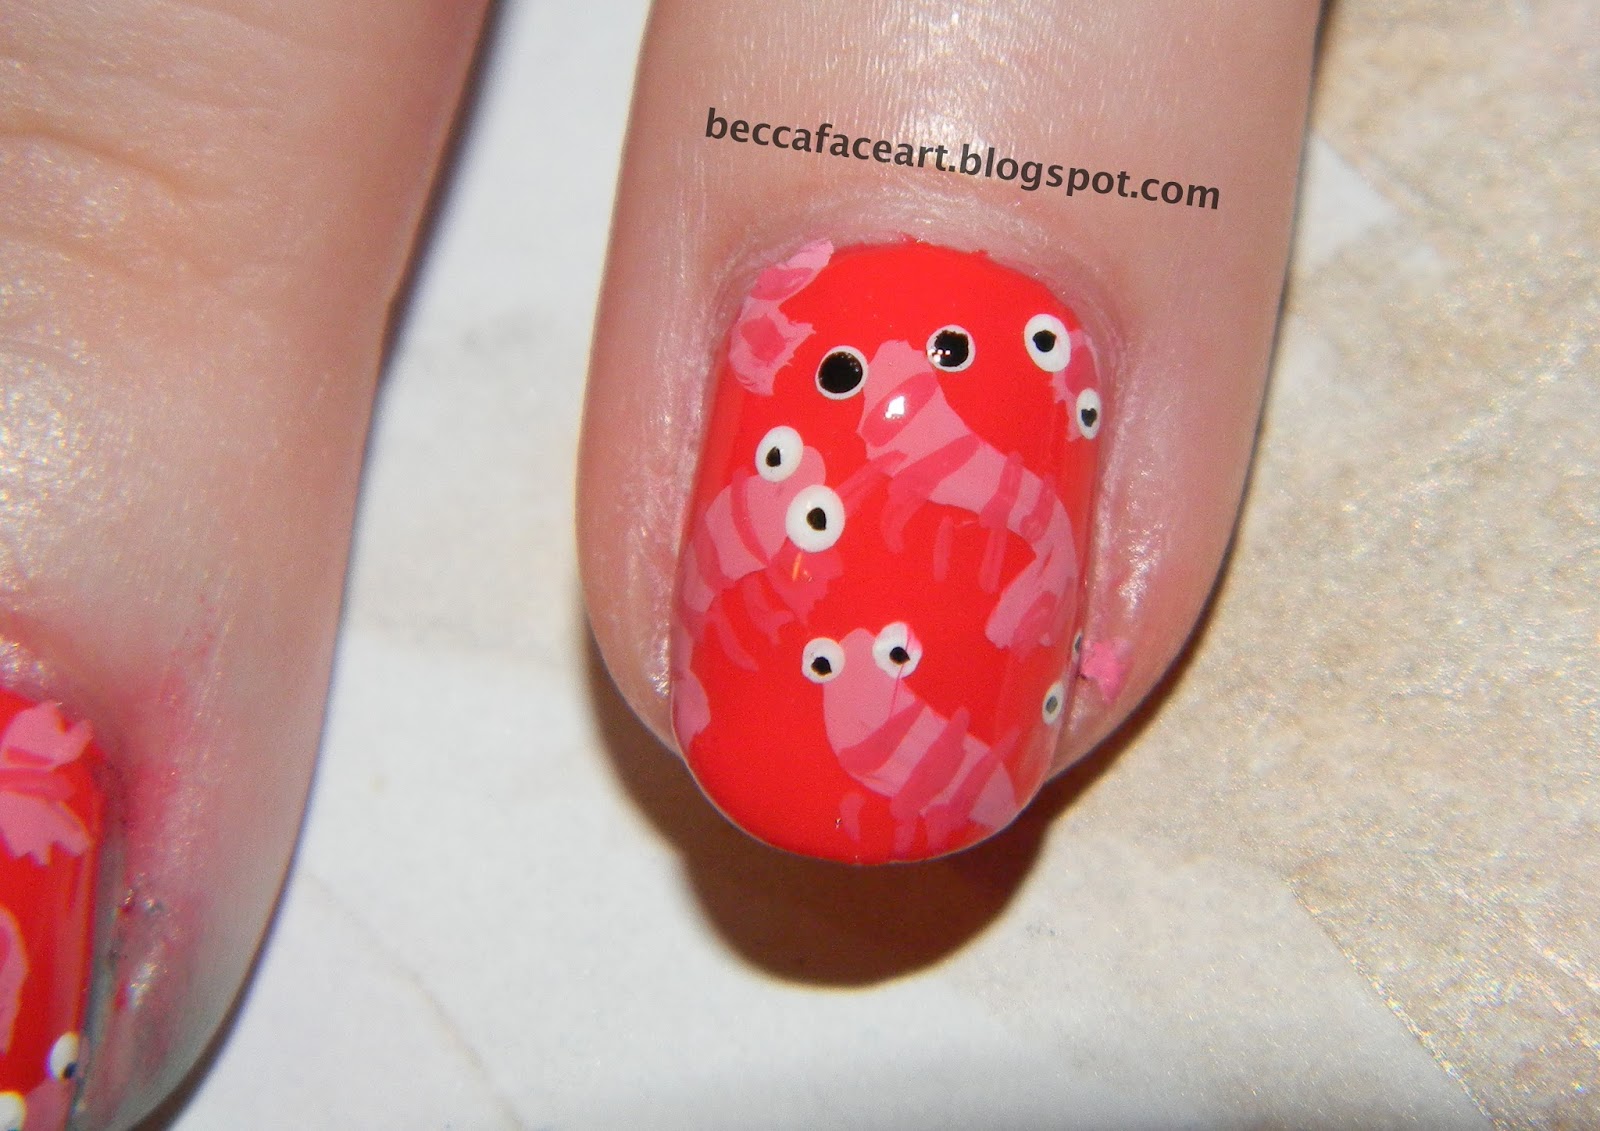
Aaaaaaand we're back to the nail art challenge posts! Woo. I just had to finish a lab for my Experimental Psychology class, so I am absolutely ready to just relax and blog a little. And I'm particularly excited about this design, because it is beyond precious!! SHRIMP NAAAAAIIIIILLLLLSSSSSSSS GOOOOOOOOOOOOOOO~


(These first three pictures are my friend Lindsay's nails! She asked for a shrimp with dilated eyes on one finger, and one with eyelashes on the other!)

(I really liked the dilated-eye shrimp, so I made all of mine on my ring fingers have giant eyes like they're afraid or in awe of something.)


Aaaaaah, so many pictures! It always baffles me how I can not have enough pictures of some designs, but then I check my memory card and suddenly I have so many pictures of this design. So many. But at least they're all different! So, as you can see in the last picture, my inspiration and base color was OPI Cajun Shrimp (yes I have used this polish in the previous two posts too but I love it and can you blame me?) The shrimp are painted completely with acrylic paint (white, pink, red, and black) and a teeny tiny brush. So, this counts as animal print, right? Because these little shrimp were so cute and happy. I didn't want to do a traditional animal print (there's nothing wrong with that, I just don't typically wear animal print, so I went with this instead), and I think shrimp are a bunch of cutie patootie sea-bugs. Of course, shrimp are bluish grey when they're alive underwater, but that wasn't good for the aesthetic, so I suppose that makes these cooked shrimp? That's horrifying to think about, but oh well! They were cute anyway! So I hope you like them as much as I did.

Thanks for reading, have a great day, and happy painting! :)

Wednesday, September 11, 2013

Pastel Nautical Nails

Heeeeey guuuuuurl, how you doin'?

Okay, sorry. I had a moment. Anyway, who loves nautical nails?? (Hint: IT'S ME, IT'S TOTALLY ME)


(I apologize for the three pictures that look exactly alike, I apparently didn't get any better pictures before I took this design off)

Okay, so these aren't exactly pastel. But I didn't know what else to call them, so I took inspiration from the lovely, dusty, pastel teal that is OPI Gargantuan Green Grape. So for my thumb and ring finger, my base color was OPI Cajun Shrimp, with white acrylic paint stripes on them. On my middle finger, I painted Essie Good As Gold and then put e.l.f. Golden Goddess over that. Then for my index and pinky fingers, my base color was OPI Gargantuan Green Grape with stamped anchors from Cheeky plate 36 with Essie Good As Gold on them. 

These were absolutely precious, and they were a really nice break from the 31 Day Nail Art Challenge. Like I said in my previous post, my best friend left for a study abroad trip in Japan, and I felt like I needed some retail therapy - So I picked up my three base colors up there. Of course, I had to use them immediately, haha. I love nautical nail designs more than any other design, so it was a natural pick when I was looking for something easy and comforting to paint on my nails. I painted my sister's nails and then mine, all while she was reading scary stories to me. It was a pretty good way to spend a few hours! I'll be getting back to the Challenge in my next post, but until then... Thanks for reading, have a great day, and happy painting! :)

Tuesday, September 10, 2013

Gold Leaf-esque Nails

Alright, who's ready for a break from the 31 day nail art challenge?? I certainly am! My sister and I read scary stories to each other two weekends ago while I painted her nails and mine. My best friend left for Japan that weekend on a study abroad trip, and I really really didn't want to paint animal print on my nails, I just wanted something comforting and lovely. But my nails will be in the next post. This post is about what I painted on my sister's nails!


(This one was just for fun - look at how much shorter my nails are than hers! And this is right before I cut my nails because they were getting a little too long for my tastes! AND my sister is six years younger than me! What I'm getting at here is that it's weird.)

*Ahem* Anyway... She couldn't decide what she wanted (which is pretty unusual, because she almost always has something extremely complex and time-consuming in mine), so she picked a color that she liked and I kind of went with it. The base color is China Glaze Custom Kicks, which is just the perfect polish. Literally, it has no flaws. It's opaque in one coat, and it's got just enough gold shimmer in it to make it buttery. I love it. And Em did too! Then I stamped over it with Essie Good As Gold and the weird splotchy stamp from Pueen plate 45 (you could also achieve this effect with gold leaf, or with a gold topcoat. 

We almost left it like that, because Em loved the combination so much. But I said, "Nay! We shall add moooore!!" And so I stamped the little flower from Mash plate 29 with a gradient of Wet n' Wild Black Creme and OPI Cajun Shrimp on the accent nails. They were AWESOME. They received lots of compliments and Em loved them. We were really sad to see them go, because Em is in marching band and they're not allowed to have polish on. So before football season, she would only let me paint her nails once every 2 to 3 weeks (because seriously she could make her polish last that long without chipping and I just don't understand because I can barely get it to last for 2 days), but now that she has to remove all polish on Thursday night, I get to paint her nails every week! Yippeeeeeee! So expect to see a lot more of her nails on here in the next several months! 

Well, this post has been long enough, I think I'll leave you be. Thanks for reading, have a great day, and happy painting! :)

Monday, September 2, 2013

31 Day Nail Art Challenge! Day 8: Metallic Nails

Hi there! I actually have something super important to do for one of my classes right now, but I wanted to take a quick break and post something really quick, so this is going to be very short, sweet, and to the point! Here are my metallic nails for day 8...


These would have been really awesome, except the polish I used is not ideal for wearing on its own. I wore four coats of OPI Pros & Bronze - it was waaay too thick for my liking. But it was super pretty and extremely eye-catching. I stamped the little lace image from Pueen plate 28 with Wet n' Wild Black Creme on my ring finger and thumb as an accent. I think this polish would look really fantastic on someone with a tan, rather than my pale skin. Although, since Pros & Bronze is actually more of a rose gold than a yellow gold, it still went well with the pink tones in my fingers. So it was nice! Next time I would layer it though, because four coats made it so thick. Anyway, thanks for reading, have a great day, and happy painting! :)

Thursday, August 29, 2013

31 Day Nail Art Challenge! Day 5: Blue Nails

Hi there! Long time no see. I have been keeping up with the nail art challenge, I just haven't updated my blog posts because I have been so busy with my classes starting back up. So they've kind of been piling up all this time. But I'm trying to get on top of things! So I'll start where I left off - blue nails!

I had something completely different in mind, but then when I actually went to paint them, I wanted something more dramatic and with a little more contrast.


See, very visually interesting because the colors are so contrasting! On my index, middle, and pinky fingers, I painted two coats of OPI Swimsuit... Nailed It! I have been waiting forever for the perfect time to use this polish, because on one hand it is gorgeous, but on the other hand it stains like a mofo. But it is a flawless match to the color of my glitter, so I had to use it! Then on my ring finger and thumb, I painted two coats of Sally Hansen Xtreme Wear White On and then one coat of China Glaze Mosaic Madness. These were really awesome and dramatic, and I loved them. So I hope you like them too! On to the next post! Thanks so much for reading, have a great day, and happy painting! :)

Friday, July 19, 2013

Tentacle French Tip Design... Inspired by Robin Moses! :)

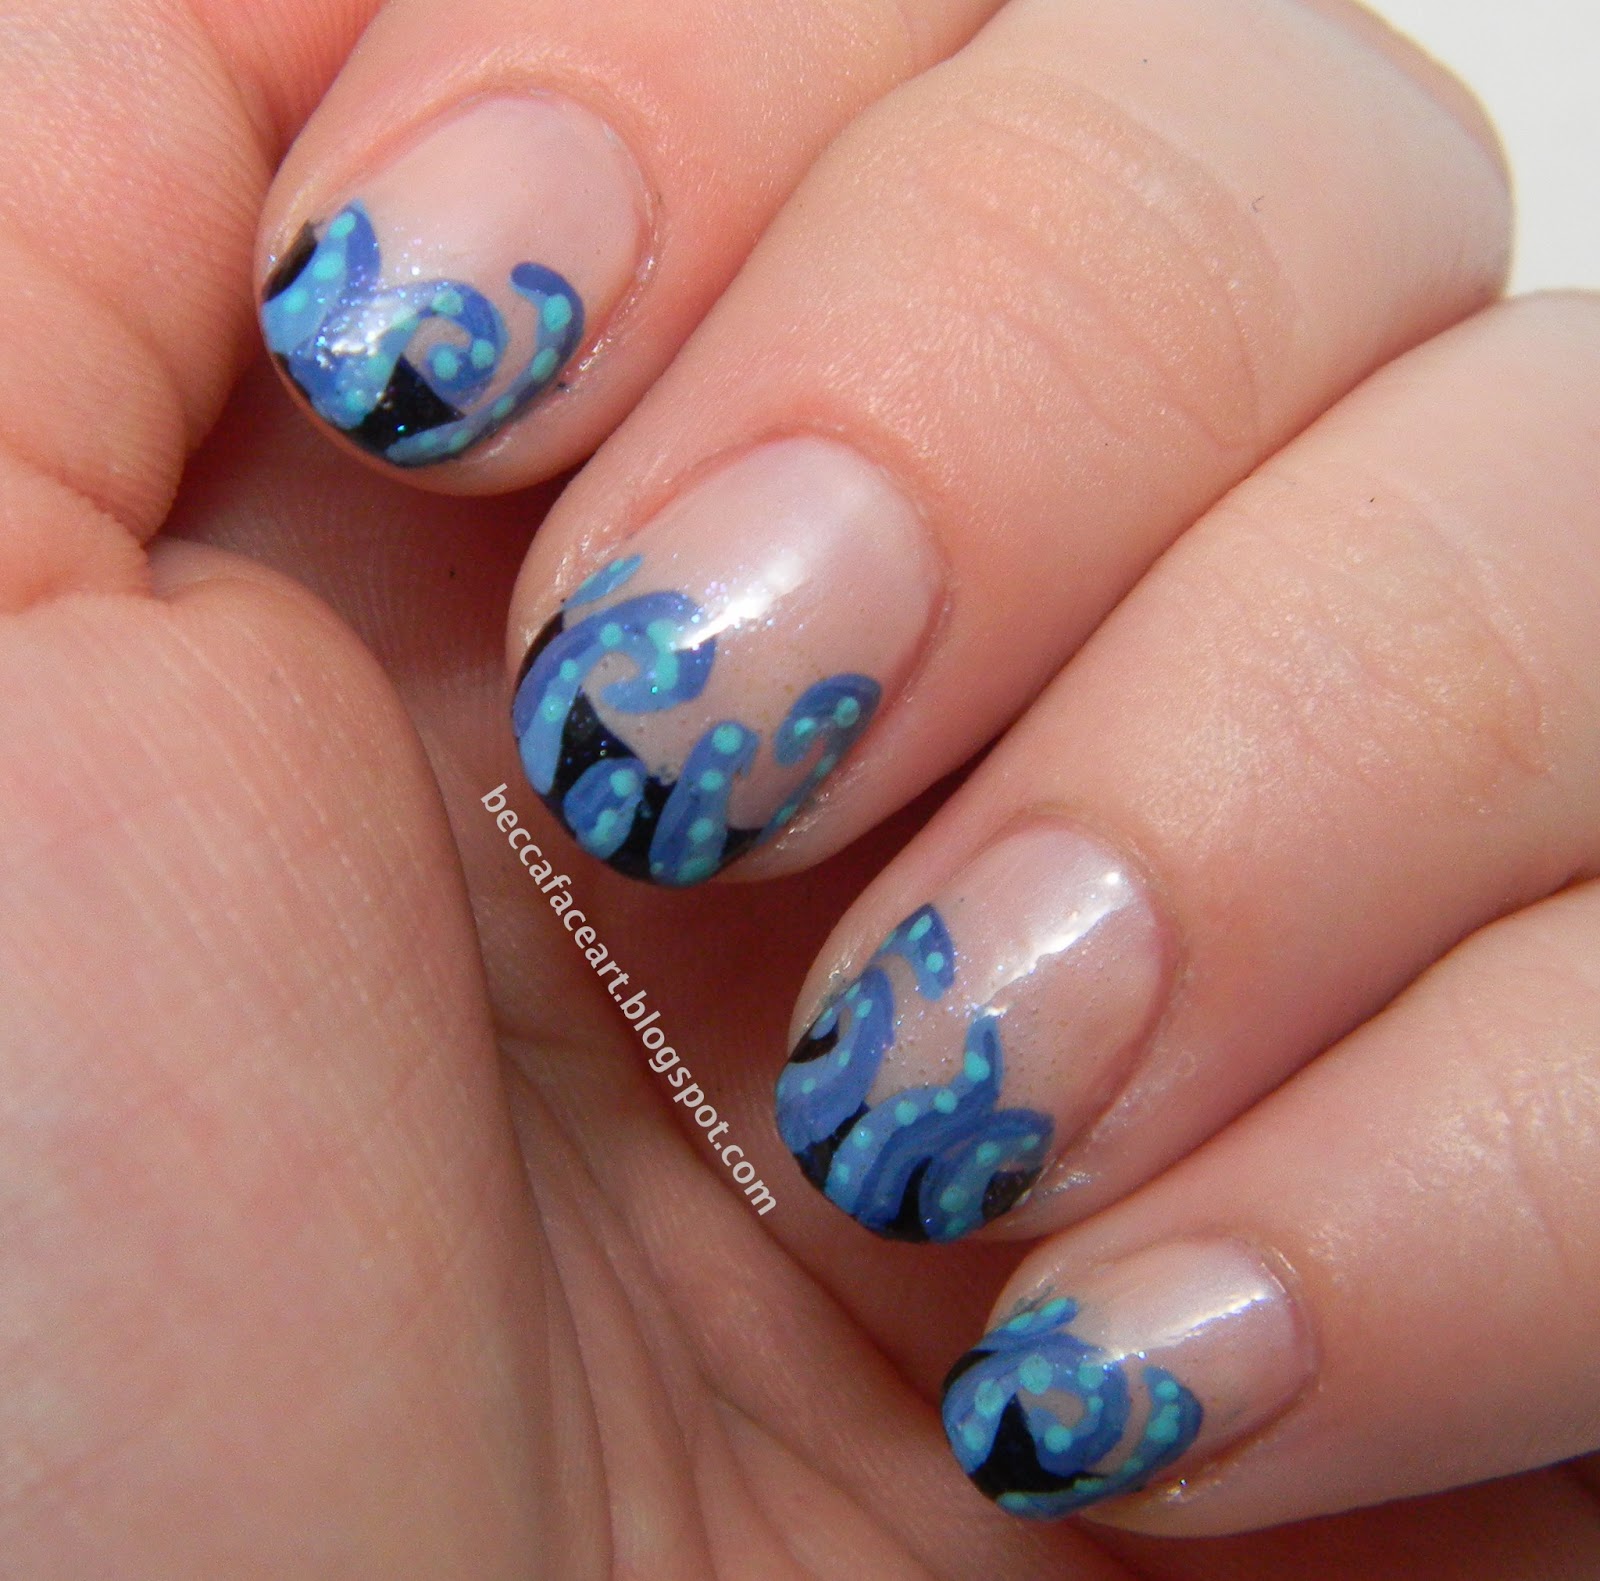
Hi there! So, I don't know if you know who Robin Moses is, but you should. She's on YouTube, and she's probably one of the most creative and talented nail artists out there, and you should go watch her videos. She did one design that I absolutely loved, so I decided I had to recreate it! Here's a link to her video. And here's what I created based on that:


Alrighty, so here's what I did. I started with two coats of Orly Déjà Vu and then made a french tip with the dark blue end of Revlon Moon Candy Galactic. Then I used acrylic paints (two different shades of blue and a light teal for the suction cups) for the tentacles. I went for a more literal approach whereas Robin made more abstract tentacles. She also used an opal polish to make the tentacles two-toned, but I don't own any opal polish so I substituted with a darker shade of blue paint. Then I went over the tentacles with a quick swipe of OPI I Juggle... Men. It gave it the slightest sparkle and definitely made it elegant. So I hope you like it! And definitely check out Robin Moses, because she's incredible and she's much better at this than I am. Thanks for reading, have a nice day, and happy painting! :)

Tuesday, July 16, 2013

Pink Bow Nails

Hi there! The title may be misleading... I painted my nails pink and stamped a bow on them, they're not pink bows. They were so cute!! And also, this design set a record for me - they lasted a full seven days without chipping once. It was awesome! I didn't do anything differently, so I'm not sure what made them last, but I was so glad they did because they were freaking cute.


Aren't they fantastic?? So cute. I did three coats of a nameless hot pink Bon Bon polish (I probably could have gotten away with two coats had I been patient about it) and then one coat of one of my favorite glitter polishes (I use it all the time, seriously) OPI Pirouette My Whistle. Then on my thumb and ring fingers, I stamped the bow image from Pueen plate 29 with Sally Hansen XTreme Wear White On. I usually stamp with Sinful Colors Snow Me White, but I could not for the life of me get it to stamp properly. I had to redo my ring finger completely twice because it wouldn't work. So I used another, thinner white that I wouldn't use over anything darker. But I think it turned out great anyway! Let me know what you think. Thanks for reading, have a great day, and happy painting! :)

Wednesday, July 10, 2013

Cat Nails

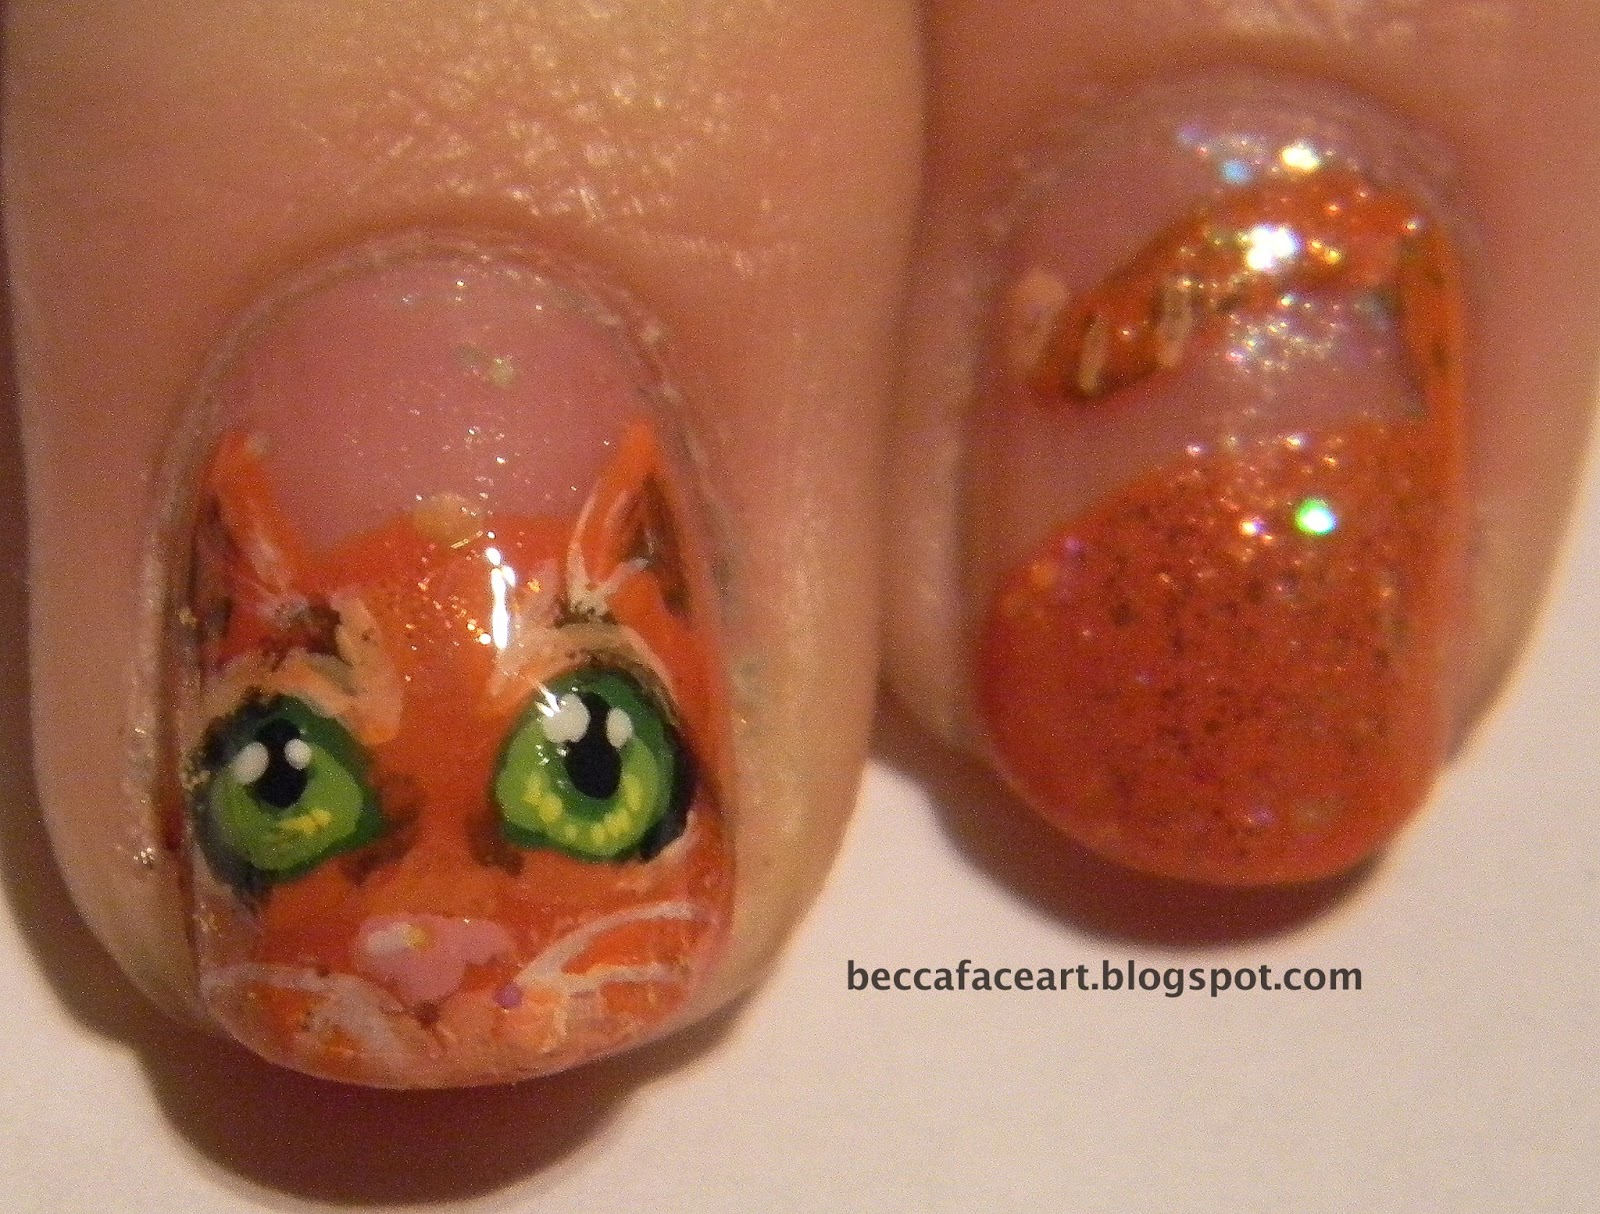
Hey there! So today I'm going to share with you some nail art I did on my sister's nails. She asked me to paint some characters from a book series she reads, where the characters are cats (The Warriors series by Erin Hunter).

This is Cinderpelt - I used Ulta Concrete Evidence as the base color for the basic cat shape on my sister's pinky and ring finger on her right hand. For the details (haha, see what I did there), I used acrylic paints and a teeny tiny paint brush. Then since we decided that all the cats needed to be sparkly, I also did one coat of OPI Pirouette My Whistle and one coat of a nameless Bon Bon polish. 

This is Firestar (middle and index finger on her right hand) - I used China Glaze Life Preserver as the base color. The details were done with acrylic paints on all of the cats. And since Firestar is orange, I used OPI Pros & Bronze as my glitter, as well as the Bon Bon polish.


For the thumbs, I used Wet n Wild Black Creme to paint the symbols that represent the cats' clans - on the right hand with Cinderpelt and Firestar, I painted the Thunderclan symbol, and for the left hand, I painted the Riverclan symbol. I'm sorry if you have no idea what I'm talking about, but imagine it like the student houses in Harry Potter. I went over both of these with the Bon Bon polish.

This is Stormfur (index and middle finger, left hand) - I used Wet n Wild Black Creme as the base color, and Wet n Wild Rock n Roll and the Bon Bon polish as the glitter.

This is Feathertail (ring and pinky fingers, left hand) - I used Ulta Concrete Evidence as the base color, and OPI Pirouette My Whistle and the Bon Bon Polish as the glitter. Feathertail was my favorite, she turned out the best! :)


And that's it for this post! My sister loved these so much that when I spent a week away from home the first thing she said when I came home was " My cats chipped and I need you to fix them immediately!!" Haha, I didn't fix them. So I hope you like these! Let me know if you try them. Thanks for reading, have a nice day, and happy painting! :)
Tuesday, July 9, 2013

Lava Nails

Hey there! So, I love lava. I'm just gonna get that out of the way. It's so freaking cool. And I think I've represented it pretty well here with this lava nail art!


Oh my gosh, this is so freaking cool. I am just in love with this. And it's bright, because my secret is neon polish! I started with a base coat of Sinful Colors Snow Me White, then sponged around the edges with China Glaze Hey Sailor, and then sponged in the middle with Funky Fingers Like Clockwork (this is probably the brightest neon polish I've ever encountered). And to add a little sparkle, I did a few light stripes on the sides with OPI Pros & Bronze. Then came the magical part - I did a very thin coat of Sally Hansen Crackle in Ink Splatter. It's important that it's a thin layer, because otherwise it won't separate very well and you won't get the contrast between the lava and the solid rock - erhm, the orange and the crackle polish. Heh. Then to top it all off, I used a matte top coat (Essie Matte About You). Usually I put a coat of regular, fast drying top coat on first, but this time I really wanted to be able to see the ridges between the rocks and the lava where the crackle polish is thicker. It was an interesting textural component of this manicure, and I loved it! :)

So I hope you enjoyed these as much as I do, and let me know if you try them! Thanks for reading, have a great day, and happy painting! :)