Showing posts with label nail art. Show all posts

Wednesday, October 15, 2014

Little Ghostie Nails

Hi all! Here's my first Halloween design for this year. It's subtle and requires absolutely no work other than painting a base color and putting a sticker on. :)


I thought this sticker was absolutely adorable and it looked really great over a dark color! I thought the sticker was white, but it turned out to be slightly translucent. A fantastic surprise!

My base color is China Glaze Howl You Doin', which came out in their 2013 Halloween collection. It's a beautiful, deep plum base with orange and purple glitters in it. It definitely looks almost-black indoors, but you can see the glitter once you go outside and it's stunning. I decided it was just witchy enough to put the sticker over. :) The nail sticker came in a small Halloween pack that I got from Five Below. I don't have the packaging any more (my bad), but here's what they look like:


Surprisingly the sticker lasted for several days until I was ready to take that design off! Anyway, I hope you like it! There are more designs to come, and they are much more complex. Thanks for reading, have a great day, and happy painting! :)


Thursday, August 14, 2014

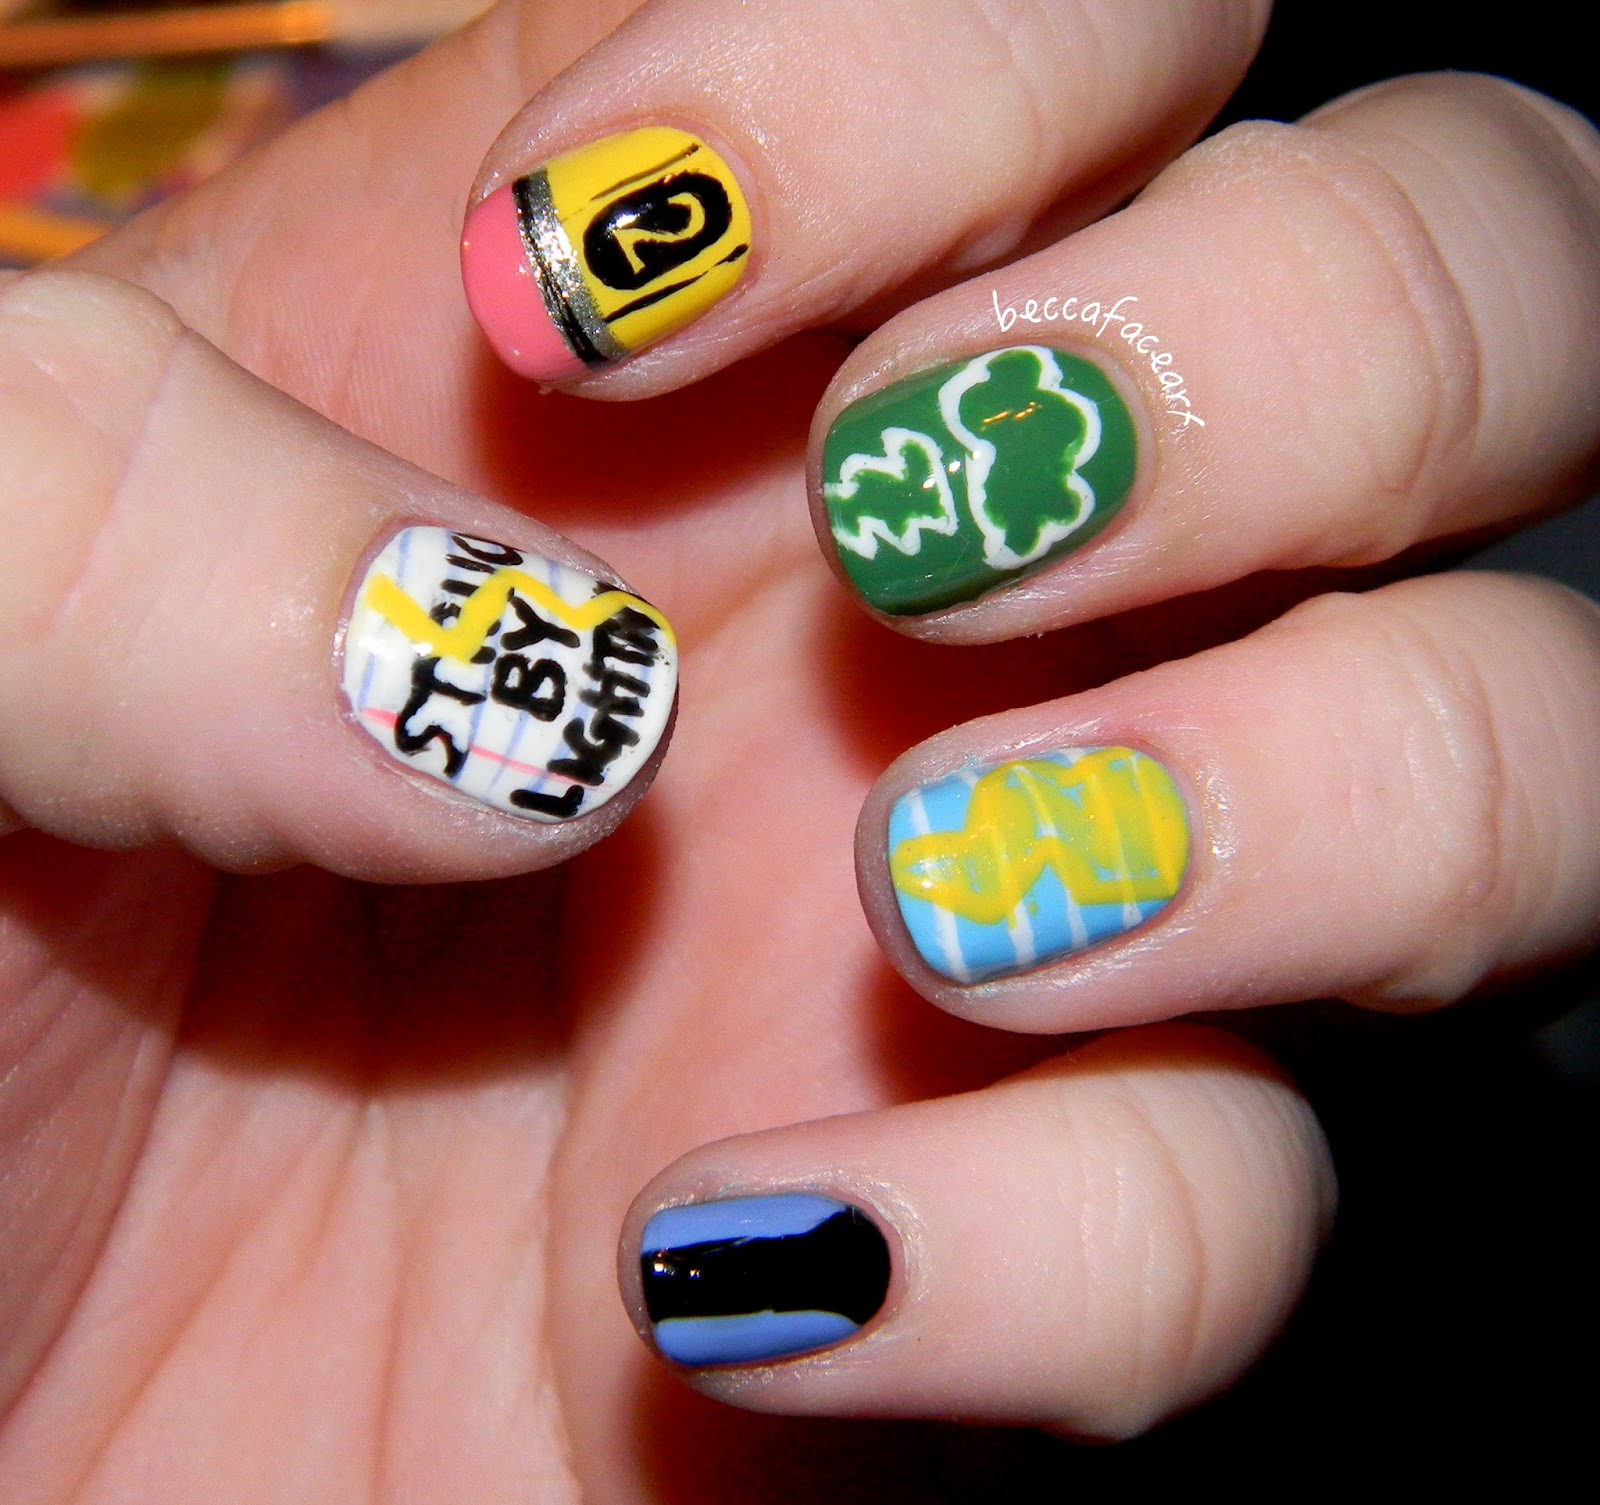
Struck By Lightning Nails

Hi there! I have a really cool design for you today! It's one of my favorites that I've ever done! :) It's based on the movie/book Struck by Lightning by Chris Colfer. If you haven't seen the movie, it's incredible. Do yourself a favor and watch it. It's a lovely film, and the book is just as amazing. Chris Colfer is probably one of the most talented men of our time, and I'm always eager to support him. So I painted my nails, inspired by his wonderful book!


Woo! I love these so much. I think I did a pretty good job of getting the images from the book and the movie right. :) Dare I even say they're pretty cute as a back to school design? Ha!

Thumb: Sinful Colors Snow Me White (base color), Sinful Colors Soul Mate (pink stripe on the side), China Glaze Secret Peri-Wink-le (blue horizontal stripes), Sally Hansen Mello Yellow (lightning), and black acrylic paint for the words.
Index: Sally Hansen Mello Yellow (base), Sally Hansen Celeb City (silver stripe), Sinful Colors Soul Mate (eraser tip), and black acrylic paint.
Middle: China Glaze Starboard (base), and white acrylic paint.
Ring: China Glaze Bahamian Escape (base), Sally Hansen Mello Yellow (lightning), and white acrylic paint.
Pinky: China Glaze Secret Peri-Wink-le (base) and black acrylic paint.
Topcoats: Seche Vite (glossy) and Essie Matte About You (matte)

I hope you like them as much as I do! I also hope you check out Struck By Lightning and the book that goes with it, because Chris Colfer deserves it and his work truly is incredible. Thanks so much for reading, have a great day, and happy painting! :)


Sunday, August 10, 2014

Back again... and Mermaid nails! :)

Hello everyone! It's been a looooooooooong time. An indecent amount of time. And for that, I am so sorry. Really, I tried to keep up with it, but I've had some mental health problems over the summer (after the crazy semester from hell at school), and I just kind of... stopped caring about my nails. I did still keep them mostly painted, but I've neglected my cuticles and I didn't do any nail art whatsoever. This is something that I never wanted to happen, ever. I love painting my nails and blogging with you guys, and I was always afraid that I would just stop one day and not start back up again. Well, after a long summer and some time to get back up on the metaphorical horse, I'm back! Another semester in college is going to be starting for me next week, and I decided it was time to nip this little mood in the bud and get back into the groove of things. :) So. I have a few more things to say and then I'll show you some mermaid nails! :)

1) If you have been keeping track of my 31 Day Nail Art Challenge posts, I am sorry to say that I'm not going to be continuing that. It honestly was a mistake of me to try and take that on, because I just wasn't that dedicated to it from the get-go. That being said, I have a few designs in a folder on my computer that I did complete for the challenge, but never posted. So I'll post those, but they won't be part of the challenge, because maaaaan. Forget that challenge *z-snap*.
2) And this brings me to my next point. I have several designs that I never posted from back in March-May. I will probably post some of those, because I like them and they're still nice designs... they're just a few months old, haha. So you will probably see those for the next few posts before any actually recent designs.
3) And finally, as you all know, I obviously have a problem with how long my posts are. I talk too much. As such, I'm going to try and keep them AS CONDENSED AS POSSIBLE in the future. For real. For designs, I might just say what polishes/stamps/paints I use and maybe elaborate a teeny tiny bit (an example will be below for the mermaid design). For reviews of polishes (such as indie polishes and swatches and things like that), those will be longer. But I honestly have to get a grip on the length of my posts, it's ridiculous.

With that, I just want to thank all of you for being patient with me, and for being amazing in general. :) You're wonderful and I am excited to come back to blogging because you all make it fun! And now, on to the nail art~~~~~~~~~ WOOOSH


Meeeermaaaaiiidssssss! I love mermaids, I think they're great. And they're the perfect summer manicure!

Base color: China Glaze Keep Calm, Paint On
Stamp colors: (gradient - from cuticle to nail tip) China Glaze Fancy Pants, Spontaneous, and Tart-y for the Party
Stamp: Mash Stamp Plate 39
Glitter: Orly Mermaid Tale

I really like for the scales to stand out, so I picked Keep Calm, Paint On as my base color because it's very pale and accepts other colors well. And the scales are all colors that look great together. The whole look is very shimmery and the glitter (only painted around the edges) gives a lovely rainbow pop on your nails. It's a subtle design but it's very eye catching! :) I hope you like it as much as I do!

Let me know if you have any questions or concerns, and let me know what you think of the new way of doing these posts. As in, do you prefer me to type everything out and keep my posts longer, or would you prefer me to list my supplies and keep it simple? I'd love to here from you about this. I just want to thank you again so much for reading, it absolutely means the world to me! Have a great day, and happy painting! :)


Friday, February 21, 2014

Belated Valentine's Day 2014 Nails - Gold Heart Studs

Hey everyone! So, I think the title of this post says it all, right? No need to explain? No...? Well, basically this week has been my "homework from hell" week. Coupled with last week, which was ANOTHER snow week here in Georgia. It's kind of scary, to be honest. It was below freezing every day last week and now it's 70 degrees out. The weather is doing weird things. So, because of the crazy weeks, I did not get to paint my nails for Valentine's Day (or as I fondly refer to it, Singles Awareness Day) until the 14th! And then I went out with my friends and my mom and watched Winter's Tale in theaters (can you say best holiday ever? Colin Farrell and Russell Crowe in the same movie? Mmmmm yes indeed) and then I haven't been able to post my manicure all week because of the homework from hell. But they're here now, so don't worry. I'm afraid they might not have been worth the wait, haha.


So for my base color, I used China Glaze Ahoy!, which is one of my absolute favorite CG polishes ever. You may not be able to tell in my photos (taken sans light box because I was in a hurry), but I think it's extremely flattering on my skin tone and it's just such a rich, glistening pink. I love it more than any other pink in my collection, hands down. I then paired it with some big (well, they were big on my teeny tiny baby nails, but they're probably medium sized for other people) gold heart studs that I got from Five Below. I had to bend the studs so they would sit flat on my nails, but they still ended up falling off within two days. But that was probably because I didn't bend them enough. Thankfully, I didn't lose them and they're still in good shape, so I can probably reuse them! :)

So I know this was super simple and a week late, but I still hope you enjoyed it! Let me know what you think. Thanks for reading, have a great day, and happy painting! :)

Thursday, January 30, 2014

KBShimmer "Clown Puke" Swatch

Alrighty, another indie! KBShimmer Clown Puke. Woohoo! I LOVE THIS ONE. So much. It was on my list of polishes that I need for a very long time. It's perfect in every way - So I'm super excited to show you my swatch! You know the drill by now, I'll show you the swatch first and then talk more about the polish afterward. :)


This is one perfect coat of Clown Puke over two coats of Essie Mint Candy Apple (I also tried it over my universal glitter base color, OPI Gargantuan Green Grape, and I didn't like it as much! So MCA it is.) This indie is loaded with glitter of every size in every shape - hex, square, circle, stars, hearts, you name it! And they're in every color!! My favorite glitters were the giant circle glitters, which you can just barely see one on my thumb in the first picture. It's so good. And like I said, this is one coat. It's so full of glitter. I had to do minimal placing of glitters as well, they just kind of fell where I wanted them to go. And the formula is fantastic, of course. Despite the sheer magnitude of glitter in this polish, it isn't thick at all. So basically, I give it a 10/10, would wear over and over again because it's perfect and beautiful.

I received this polish for Christmas, so my opinion is honest and hopefully it convinced you that you need this polish. Everyone needs it, for real. And if you feel that you need it as badly as I did, you can purchase it on KBShimmer's Etsy shop and their website.

So I hope you enjoyed! Thanks so much for reading, have a great day, and happy painting! :)


Subtle Purple Filigree Stamping

Hey there! I feel like I'm posting so much right now, even though I'm not. It's because we've literally had the whole week off from classes due to the lovely weather right now - The joys of living in Georgia. So I get four snow days while the state shuts down. In all seriousness, we are just not equipped to handle this weather, and the ice is terrible still. So we have our reasons for freaking out.

So since the weather is so cruddy, I've got a really subtle, dark design for you. But hopefully this design is not cruddy. ;)


(with flash)

So for this design I started with two coats of China Glaze Up All Night (this color has recently found its way into my collection, and it is STUNNING) and then I stamped the filigree stamp from Cheeky's Jumbo Plate #8, the Princess Charming plate, with China Glaze Love's a Beach. That polish is a neon shimmer polish, but it's sheer enough that it made the stamp look purple over the blue! It was very subtle, which I LOVE. I love how the slightly different stamp shade is just visible enough to pique someone's interest, and then they have to look closely to see it, and I just love it. Is that conceited of me? Pffft, nah. 

So that's it! It was super simple, and I hope you like it! Thanks for reading, have a great day, and happy painting! :)


Wednesday, January 29, 2014

31 Day Nail Art Challenge! Day 23: Inspired by a Movie

Heeeey! So for this challenge, I’m actually using the nails I wore when I went to see Thor: The Dark World. That’s inspired by a movie, right? J So this design, in my opinion, is not the most original Thor nails. And it’s not necessarily designed for Thor: The Dark World either. They’re just Thor and Loki nails, because I enjoy them both more than you would believe. So let’s get into it!


On my left hand I painted Loki because he’s my favorite. Don’t get me wrong, I like Thor a lot, but Loki’s such a good character and I am absolutely fascinated by his amorality. So on my thumb (not pictured here, but you can see it later on in the post) and ring finger, I painted two coats of Essie Good as Gold. On my index, middle, and pinky fingers, I painted three thin coats of Sinful Colors San Francisco. It’s such a lovely color, but so, so sheer. Then on my thumb, I painted “Loki” with San Francisco. On my ring finger, I painted a coat of a fine gold glitter (a random striper polish), but I think this design would look much better with some chunky gold glitter. I don’t have any. L And just because I wanted to keep the design simple, I painted Loki’s helmet on my middle finger with Good as Gold and some black paint with a tiny baby paintbrush. It’s adorable. And then I moved on to Thor!


On my right hand, I wanted to match my Thor nails to the style I painted Loki with, so on my thumb (again, not pictured, but you'll see it I promise), I painted two coats of Wet n' Wild Burgundy Frost. Then on my index, middle, and pinky fingers, I painted two coats of Wet n' Wild Denim Chrome. And on my ring finger, I painted two coats of Sally Hansen Celeb City and one coat of Essie Set in Stones. And for the designs - on my thumb I painted "Thor" with Celeb City and on my middle finger, I painted Mjölnir (or you could say Mew-Mew like Darcy in the movie) with Celeb City, Burgundy Frost and some black paint. 

And here's what they look like together!

There's those pesky thumbs!


So I hope you like them! I actually wore these to the movie premier, but I never posted them. But they fit the challenge perfectly, so hope was not lost and I finally got to show them to you. So let me know what you think, I'd love to hear from you!

Thanks for reading, have a great day, and happy painting! :)


Tuesday, January 28, 2014

31 Day Nail Art Challenge! Day 22: Inspired by a Song

Hey all! I have an idea for a new series of nail art that I want to do (and I’m excited to get started on it) but I realized that I really need to finish posting all of the 31 Day Nail Art Challenges before I can start on a new thing. So it’s going to happen, I’m in the last stretch!!

So for today, I have the “Inspired by a Song” challenge – I chose “Cough Syrup” by Young the Giant. I dunno, I guess I just wanted to have a good cry while I painted my nails. But I also thought it was descriptive and I liked the design I came up with for it.


I knew I was going to paint some more detailed designs, so I wanted a neutral background. I painted two coats of Orly Déjà Vu on all of my nails, and then I used acrylic paints for all of the art, just because it was easier to shade with craft paint than with nail polish. On my thumb, I painted a drum for the line “A wet world aches for a beat of a drum.” On my index, I painted a spoon of cough syrup for the line “One more spoon of cough syrup now.” On my middle finger, I painted the words “Losing my mind” for that very same line, haha. I used different shades of a pinkish-purple to make it look like a gradient, even though there was no actual blending involved. On my ring finger, I painted a zombie and a realistic heart for the line “These zombies in the park, they’re looking for my heart.” And finally on my pinky, I painted a “Splash of the sun,” which unfortunately looks like a sad sunny side up egg. I intended for it to look like a splatter spot sun, but it’s the thought that counts. J

So that’s it! I hope you like it! Thanks for reading, have a great day, and happy painting! J

Wednesday, January 8, 2014

31 Day Nail Art Challenge! Day 20: Water Marble

Yes, I'm still doing this challenge. I'm so over it, haha. But I'm going to finish it! Anyway, I thought this day's challenge was going to be the most difficult for me, and I was right. I am AWFUL at water marbling. Just awful. It never works out, and I just end up wasting a lot of polish. But I did eventually get the polishes I chose to work, and I actually have two designs for you! My sister also wanted a water marble, and it was just a pain in the butt. At least it was pretty!


My sisters nails - I started with a base color of Sally Hansen Lava, and then I water marbled with Lava and Sally Hansen Pacific Blue.


Pardon the little cut on my cuticle in this picture, I got a little happy with the cuticle nippers! And also pardon the old water mark - these pictures were taken and edited like three months ago, haha. 


On my thumb and ring finger, I painted one coat of Fresh Paint Nebula, and then I covered it with a coat of Sinful Colors Scene Stealer. Wearing a glitter accent is a nifty little trick to avoid having to water marble on those two fingers, haha. And on my index, middle, and pinky fingers, I started with a base coat of China Glaze Pink-ie Promise. Then I marbled with Pink-ie Promise, China Glaze Life is Rosy, and Fresh Paint Nebula. Unfortunately for me, Nebula didn't marble as well on my nails as it did in my test swatches. So... It looks kind of wonky. But I liked it! My water marble had character. So I hope you like it! Let me know what you think of it. 

Thanks for reading, have a great day, and happy painting!

Tuesday, November 5, 2013

31 Day Nail Art Challenge! Day 19: Galaxies

Hello everyone, welcome all! The month of Halloween is now over and I am getting back into that 31 day nail art challenge! Starting the posts back up with one of my favorite designs... galaxies!

Just to make it easy on myself, because I have explained how to do a galaxy mani before, I'm just going to list the polishes I used under each picture. And I have three different color schemes for you because a lot of people wanted them. So I hope you like them! :)


My nails - Wet n' Wild Denim Chrome, China Glaze Dandy Lyin' Around, CoverGirl Blue You, Sinful Colors Let's Meet, China Glaze Strawberry Fields, China Glaze Towel Boy Toy, a nameless Bon Bon polish, and Sonnetarium Snowfall.

My sister's nails - Love & Beauty Emerald, Sinful Colors Snow Me White, L'Oréal Notting Hill Blues, Sinful Colors Let's Meet, China Glaze Ahoy!, and Sonnetarium Snowfall.

My friend Lindsay's nails - Wet n' Wild Denim Chrome, Sinful Colors Snow Me White, China Glaze Towel Boy Toy, NYC Charming Rose, a nameless Bon Bon polish, and Sonnetarium Snowfall.

Thanks so much for reading, have a great day, and happy painting! :)

Tuesday, October 29, 2013

Halloween Zombie Flesh Nails

WARNING! THIS POST IS NOT FOR THE FAINT-HEARTED. IF YOU ARE SQUEAMISH, YOU PROBABLY DON'T WANT ANY PART OF THIS. For this reason, I'm putting the pictures under a break! So read on if you can handle it. :)

Anyway, hello everyone! I know I'm cutting it pretty close to Halloween for these nails, but I am technically getting them up before Halloween! I wanted to wait until the last week before Halloween to do the really gory stuff. And I wish I could take the credit for this design, but it is not mine! I based it on a tutorial by PackaPunchPolish (WARNING: THIS VIDEO IS ALSO GORY IN A WAY SO DON'T WATCH IT IF YOU'RE EASILY SQUEAMISH I'M SERIOUS) on youtube. I have literally been waiting a year to do this, haha. I didn't do it exactly, I adapted it to zombie flesh instead, so it's extra gross. And since there's a tutorial for it already, I'm not really going to explain what I did, just what polishes I used. And now for the unveiling! Click the read more to see the pictures! This is your last chance to turn back!

Thursday, October 24, 2013

Halloween Rotten Pumpkin Nails!

Hello all. :) Halloween isn't Halloween without some pumpkins, right? So I painted pumpkins.... rotten pumpkins!!


(Sorry this picture is blurry! But I wanted a shot of my thumb)

Yes, I know... they're kind of disgusting. But I think they're gross in an endearing way. So, on my index, middle, and pinky nails, I painted one coat of Wet n' Wild Black Creme, and then one coat of Orly R.I.P. On my accent nails, I painted one coat of China Glaze Life Preserver and then one coat of Sinful Colors Cloud 9 to give it some shimmer and add dimension to the color. Now comes the fun part... making them look rotten! Since R.I.P. has a black jelly base, I just took it and wiped as much of the polish as I could on the lip of the bottle, then I lightly streaked it over the orange. Since it's really sheer, it just left these dirty streaks. The best way to replicate this without that specific polish is to mix a little bit of black nail polish with clear polish on a palette or a piece of paper and then streak that over your nails. Or you could even use a darker shade of orange. Whatever you've got! Then I took a black striper polish and painted on the faces wit thin, short, and fast lines. So I hope you like it! Let me know if you try it out. :)

Thanks for reading, have a great day, and happy painting! :)

Tuesday, October 22, 2013

Halloween Purple People Eater Nails

Heeeyyyyyoooooo! So, I have been crazy busy. It's ridiculous how much homework I have. But I finally got a night off! So I figured I needed to update a few posts while I can! And thus, I present to you a design inspired by my favorite Halloween song - Purple People Eater!


Isn't he cute?? In the song, he's a "one-eyed, one-horned, flying purple-people-eater." And it actually does say in the song that he eats purple people, not that he's purple. So I chose a different color instead - I started with a base color of China Glaze Life Preserver, and then I did a coat of China Glaze Glitter Goblin, which is a mix of orange, silver, and holographic glitters. It looks out of this world, so I thought it fit! Anyway, then I stamped a teeny tiny wing from the heart image on Pueen plate 41. Then I dabbed a little topcoat on it and placed a single googly eye. I love those googly eyes. Anyway, then I painted on the horn and the mouth with acrylic paint. 

Then on my other hand.... PURPLE PEOPLE! So, I bet you're wondering what's up with my color choices, because they don't really match. Well, I was supposed to go to a mini-golf course that's indoors and has black lights all over the place, so I painted these with the glowiest polish I own - Funky Fingers Like Clockwork!


Woo! These babies glowed even in the daylight, that polish is so freaking bright. Anyway, I put to coats of Like Clockwork over one coat of Sally Hansen White On, and then I painted on the purple people. The monster eats purple people, so I made them look like little gingerbread men, with some of them having bites taken out of them already! They were super cute.

So I hope you like it! Hopefully I did the song justice, because it is seriously the best Halloween song other than the Monster Mash (maybe I'll do that next.... hmm.) Anyway, thanks for reading, have a great day, and happy painting! :)


Tuesday, October 15, 2013

Depression Awareness Month Nails

Hello all! So, October is pretty much known for three things: Halloween, having the best weather out of all the months, and breast cancer awareness. But did you know that October is also Depression Awareness month? Well, now you do. Here is a fantastic webpage that should give you a good idea about how prevalent depression is. I personally know people who suffer with depression and I have experienced it myself. It's much more serious than just feeling sad - it's feeling sad, and angry, and exhausted, and unmotivated, hopeless, and helpless. It's thinking you're worthless and that no one can help you. It's becoming uninterested in your favorite things - mine was drawing and painting. Depression is serious and deserves the awareness. So I went around like a fairy wearing my green nails (because the depression awareness ribbon is emerald green) educating people about depression and how to help those who have it! But I'm not going to do that here - just know that people with depression are not making it up and it's not nearly as simple as "just being happier." It is an illness that needs treatment, and it affects real people who need understanding and acceptance. So here's what I did:


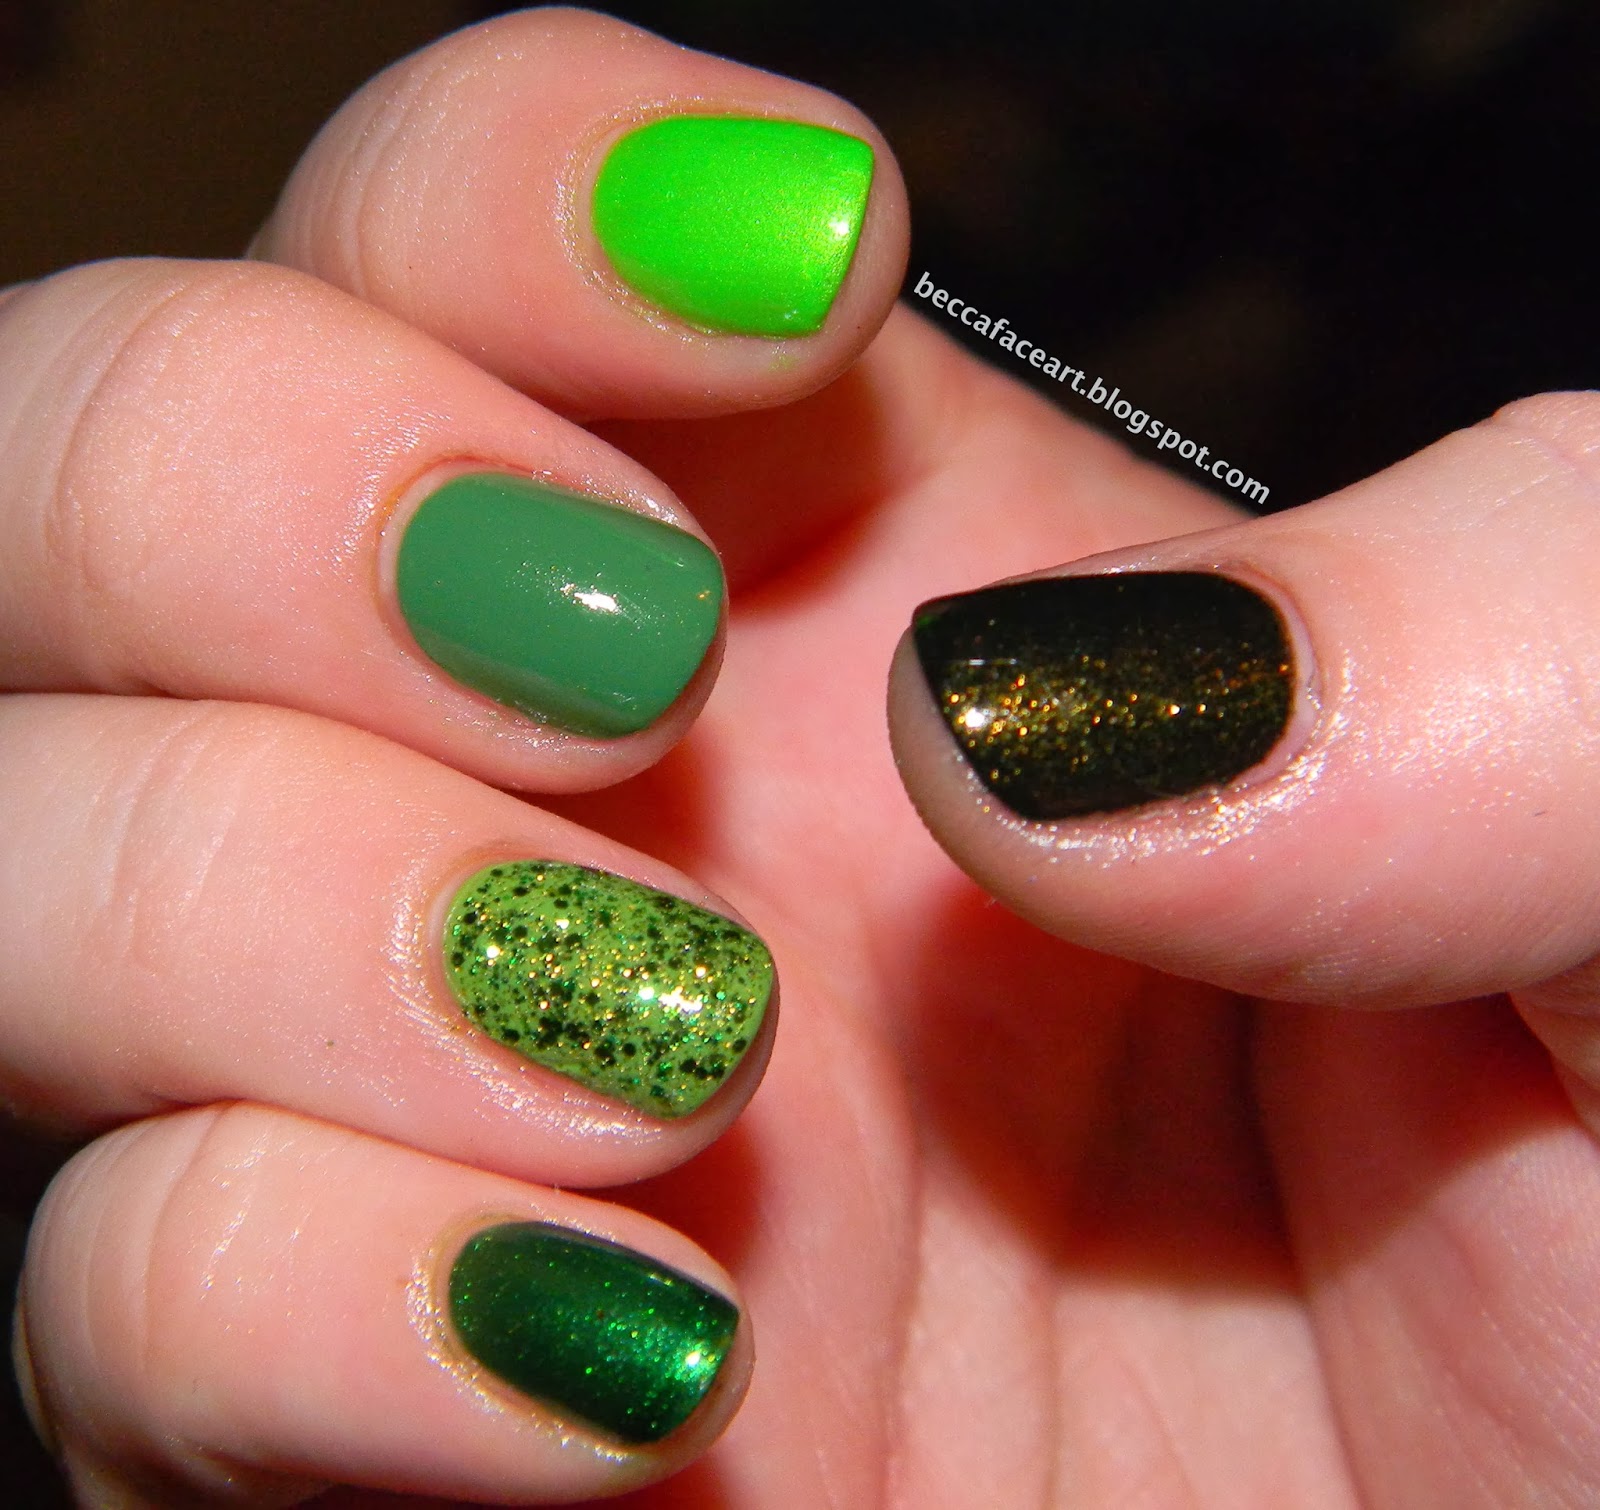
On my left hand (thumb to pinky): Sinful Colors Envy and Orly Mermaid Tale, China Glaze Tree Hugger, Zoya Logan, Sinful Colors Innocent and China Glaze Graffiti Glitter, and Sinful Colors Happy Ending.


On my right hand (pinky to thumb): Sinful Colors San Francisco, China Glaze Gaga For Green and Sinful Colors Call You Later, China Glaze Starboard, China Glaze I'm With The Lifeguard, and China Glaze Cast A Spell.


I basically took all my green polishes and used them, haha. Green makes me very happy, and it was helping me represent a cause that is important to me. Sounds like a perfect manicure! So I hope you like them. Thanks so much for your awareness, and feel free to share your experiences! Thanks for reading, have a great day, and happy painting! :)

Sunday, October 13, 2013

Halloween Witch's Brew/Magic Slime Nails

Wooo, I'm on a roll today! It's just because I've already painted all these designs, I just didn't upload them the day I did them. Sigh, my blog is just a perpetual mess. Anyway, here is my Witch's Brew/Magic Slime (I couldn't decide which name fit it better) design:


I don't think I meant to, but I managed to get all the most obnoxious Halloween colors in it? But I love it!! My base color is Sinful Colors Cloud 9. Then I took China Glaze Grape Juice and dotted it along the tips in a dripping pattern. It wasn't sparkly enough for me, so then I covered it with a purple glitter from Love & Beauty (Forever 21's brand) - I have no idea what the name of it is, because my bottle has no label. But I tried googling it, and I've seen it called Cauldron? Or it could just be Purple Glitter. I'm not sure. If you know what it's called, please let me know. Anyway, over that, I put Icing Love It and Orly Mermaid Tale for some magic bits (glitter, basically). And then, to make it even more spooky, I stamped the spider image from MASH plate 38 with Sinful Colors Innocent on my accent nails. Whew, that's a lot. But lemme tell you... They were so Halloween. They screamed Halloween. So I hope you like them! Let me know what you think. :)

Thanks for reading, have a wonderful day, and happy painting! :)

Thursday, October 10, 2013

Halloween Ghostie Nails!

Hi there! So now I'm finally getting into my Halloween nail designs (unless you count the princess nails, because that would be the start then). I'm going to have quite a few, I hope, but I somehow managed to get a late start on them. I just couldn't decide on what I wanted to do. But then a little voice in the back of my head spoke to me... "Paint ghosties.... paaaiiinnnttt ghooooossttiiiiieeeessssss~"


These were so much fun, even though they took me forever to paint. I started with a base coat of Sally Hansen Black Out on my thumb, index, middle, and pinky fingers, and then I did one coat of Orly Green Flakie Top Coat (yes, that's the name of it. Not very creative, Orly) over the black, which gave it just a little bit of pizazz under the ghosts. It's a combination of blue and purple flakie glitters, perfect for a Halloween design. On my ring finger, I did two coats of Sally Hansen White On. Then I painted the ghosts with white and black acrylic paint. Oh, and did I mention these babies GLOW??


Super rad, right? I used glow-in-the-dark acrylic paint for a single ghost on each nail, with the exception of my ring finger, which just needed to completely glow. So I hope you like them! Of course, you can try this design a bunch of different ways. You could paint all your nails black (with optional flakie topcoat, because I know not everyone is going to have it) and just have the swirly ghosties, or you could have the "evil" ghost face (because lesbehonest, he's not very evil) on your accent nails. You could also have all the ghosts be glow-in-the-dark! They looked way cooler, because the paint was transparent and you could see the flakie colors underneath them. Let me know if you try them out. Also, if you have any requests for Halloween designs, tell me! I'll be glad to try things out. :)

Thanks so much for reading, have a great day, and happy painting! :)

Pretty Pretty Princess Nails

Heeeey gurl, heeeey. So, I just got some new OPI polishes that I desperately wanted to wear. But it's October, and I also desperately wanted to wear some Halloween designs. The problem? All of the polishes I got were bright pink (and one super light purple). I didn't think this through. So, I came up with a solution - ¿¿Porqué no las dos?? Why not both? So I made up a little costume for my nails - a princess costume!!


Yes, I realize it's not very Halloween-appropriate. But who knows, someone out there might need it for an actual princess costume! On my thumb and ring finger, I did two coats of OPI Suzi's Hungary Again and then stamped the crown image from MASH plate 49 with Essie Good As Gold. The pink glitter pieces are from OPI Minnie Style. On my index, middle, and pinky fingers, I painted three coats of OPI Chic From Ears To Tail, and then stamped the little swirly image from Pueen plate 26 on the tips of my nails with Suzi's Hungary Again. And then I topcoated and watched the magic happen! These were really cute, and I would wear this design again in a heartbeat. My 20-something-year-olds group of friends and I thought they were precious, so I'm sure there are some kids (adults too) out there somewhere that would love these to go with their costume. Anyone out there being a princess for Halloween? Let me know!

Thanks so much for reading, have a great day, and happy painting! :)

Tuesday, October 8, 2013

31 Day Nail Art Challenge! Day 18: Half Moons

Hello there! I'm going to keep it short and sweet today - It's half moon time!


I started with a base coat of Sally Hansen Insta-Dri Petal Pusher (what a mouthful) and then did two coats of Orly Déjà Vu. Looking back on it, it might have worked better if I did two coats of Petal Pusher and one coat of Déjà Vu. But oh well. Then I thinned out China Glaze First Mate and free-handed the half moons with my teeny tiny paint brush. It was not as difficult as I thought it would be, but it would probably be easier if I had used a guide or a hole protector. Regardless, the blue shimmer in Déjà Vu went really well with First Mate. So I hope you like them! It's not anything crazy, just something simple for this challenge. Thanks for reading, have a great day, and happy painting. :)

Sunday, October 6, 2013

31 Day Nail Art Challenge! Day 17: Glitter

Waaaaaasssuuuuup? So for this challenge, I've got a really fun design for you! :) One that both satisfies the glitter challenge, and is perfect for Halloween!


That's right... Googly eyes!! My glitter was the inspiration: Salon Perfect Kaboom. I tried getting a good close-up of the glitter, but my camera just isn't made for that, unfortunately. But I think you can tell in a few of them that the polish is actually just blue and yellow glitter. But the two of them together and the density of the glitter makes it look green overall! It's pretty awesome! I started with a base color of OPI Can't Find My Czechbook, and then two coats of Kaboom. I thought it looked kind of creature-ish, so I pulled out some googly eyes and made cute little monster nails. My friend actually said they looked more like dinosaurs, but that works too! These probably would have been hilarious with little mouths, but I was going for something easy that really focused on the glitter. If you're wondering about wearing googly eyes on your nails, I literally just pushed mine down into the wet glitter, and then I put top coat over it to seal them in. I thought they would come off immediately, because they stuck up off my nail pretty far, but they were practically cemented on my nails, haha. I couldn't pull them off if I tried. At least, not without hurting myself. I don't suggest using Seche Vite as a top coat to seal 3D pieces on to your nails, because that never worked for me. I used Out The Door to seal mine in. But it's up to you. :) And to remove the glitters (I thought it was going to be awful because they were cemented to my nails) but I just used the glitter-foil-removal method, and they came off beautifully! Actually, I think the acetone melted the plastic eyes, haha. 

The eyes really gave my nails character, so let me know if you decide to try it out! Thanks for reading, have a great day, and happy painting! :)